Sidebar

Table of Contents
The documentation has moved to https://cryolo.readthedocs.io
Picking particles - Without training using a general model
Here you can find how to apply the general models we trained for you. If you would like to train your own general model, please see our extra wiki page: How to train your own general model.
Our general models can be found and downloaded here: Download and Installation.
If you followed the installation instructions, you now have to activate the cryolo virtual environment with
source activate cryolo
1. Start crYOLO
You can use crYOLO either by command line or by using the GUI. The GUI should be easier for most users. You can start it with:
cryolo_gui.py
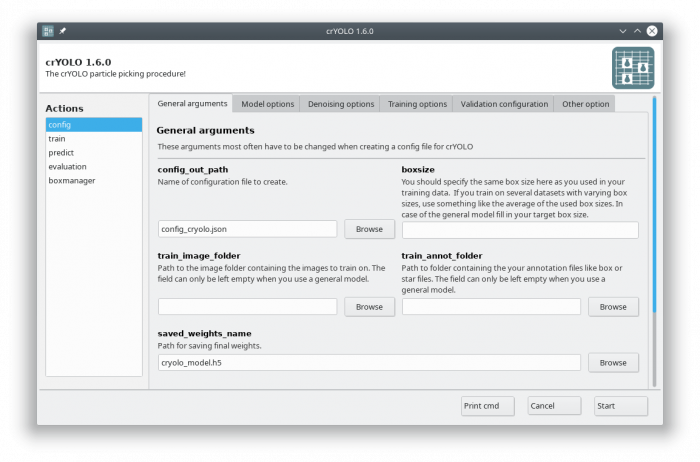
The crYOLO GUI is essentially a visualization of the command line interface. On left side, you find all possible “Actions”:
- config: With this action you create the configuration file that you need to run crYOLO.
- train: This action lets you train crYOLO from scratch or refine an existing model.
- predict: If you have a (pre)trained model you can pick particles in your data set using this command.
- evaluation: This action helps you to quantify the quality of your model.
- boxmanager: This action starts the cryolo boxmanager. You can visulize the picked particles with it or create training data.
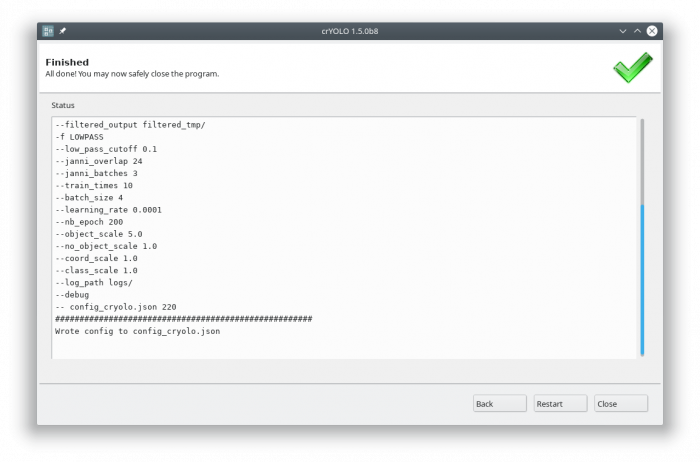
Each action has several parameters which are organized in tabs. Once you have chosen your settings you can press [Start] (just as example, don't press it now ![]() ), the command will be applied and crYOLO shows you the output:
), the command will be applied and crYOLO shows you the output:
It will tell you if something went wrong. Moreover, it will tell you all parameters used. Pressing [Back] brings you back to your settings, where you can either edit the settings (in case something went wrong) or go to the next action.
2. Configuration
In the GUI choose the config action. Fill in your target box size and leave the train_image_folder and train_annot_folder fields empty.
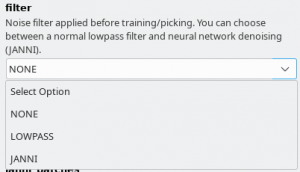
There are three general models available. It is important that you choose the same filtering options in “Denoising options” tab as we did during training the general models. In the following are the filtering settings that we used for the respective general models:
- General model trained for low-pass filtered images : Select filter “LOWPASS” and low_pass_cutoff of 0.1
- General model trained for JANNI-denoised images: Select filter “JANNI” and the janni general model for janni_model. Keep the defaults for janni_overlap and janni_batches
- General model for negative stain images: Select filter “NONE”
In the configuration file, the field “anchors” is optional during prediction. That means, you don't to define a box size during prediction, as crYOLO does a size estimation internally. This is of advantage for automated pipelines. You can simply delete the entry in configuration file. This should not affect the picking quality. The estimated size is still contained in .cbox files. Coordinates in EMAN and STAR format are written with a box size of 0 in that case.
Click to display ⇲
Click to hide ⇱
In the following I assume that you target box size is 220. Please adapt if necessary.
For the general Phosaurus network trained for low-pass filtered cryo images run:
cryolo_gui.py config config_cryolo.json 220 --filter LOWPASS --low_pass_cutoff 0.1
For the general model trained with neural-network denoised cryo images (with JANNI's general model) run:
cryolo_gui.py config config_cryolo.json 220 --filter JANNI --janni_model /path/to/janni_general_model.h5
For the general model for negative stain data please run:
cryolo_gui.py config config_cryolo.json 220 --filter NONE
3. Picking
Select the action “predict” and fill all arguments in the “Required arguments” tab:

In crYOLO, all particles have an assigned confidence value. By default, all particles with a confidence value below 0.3 are discarded. If you want to pick less or more conservatively you might want to change this confidence threshold to a less (e.g. 0.2) or more (e.g. 0.4) conservative value in the “Optional arguments” tab.
However, it is much easier to select the best threshold after picking using the CBOX files written by crYOLO as described in the next section.
Monitor mode
When this option is activated, crYOLO will monitor your input folder. This especially useful for automation purposes. You can stop the monitor mode by writing an empty file with the name “stop.cryolo” in the input directory. Just add –monitor in the command line or check the monitor box in in the “Optional arguments” tab.
After picking is done, you can find four folders in your specified output folder:
- CBOX: Contains a coordinate file in .cbox format each input micrograph. It contains all detected particles, even those with a confidence lower the selected confidence threshold. Additionally it contains the confidence and the estimated diameter for each particle. Importing those files into the boxmanager allows you advanced filtering e.g. according size or confidence.
- EMAN: Contains a coordinate file in .box format each input micrograph. Only particles with the an confidence higher then the selected (default: 0.3) are contained in those files.
- STAR: Contains a coordinate file in .star format each input micrograph. Only particles with the an confidence higher then the selected (default: 0.3) are contained in those files.
- DISTR: Contains the plots of confidence- and size-distribution. Moroever, it contains a machine readable text-file the summary statistics about these distributions and their raw data in separate text-files.
Click to display ⇲
Click to hide ⇱
To pick all your images in the directory full_data with the model weight file cryolo_model.h5 (e.g. or gmodel_phosnet_X_Y.h5 when using the general model) and and a confidence threshold of 0.3 run::
cryolo_predict.py -c config.json -w cryolo_model.h5 -i full_data/ -g 0 -o boxfiles/ -t 0.3
You will find the picked particles in the directory boxfiles.
4. Visualize the results
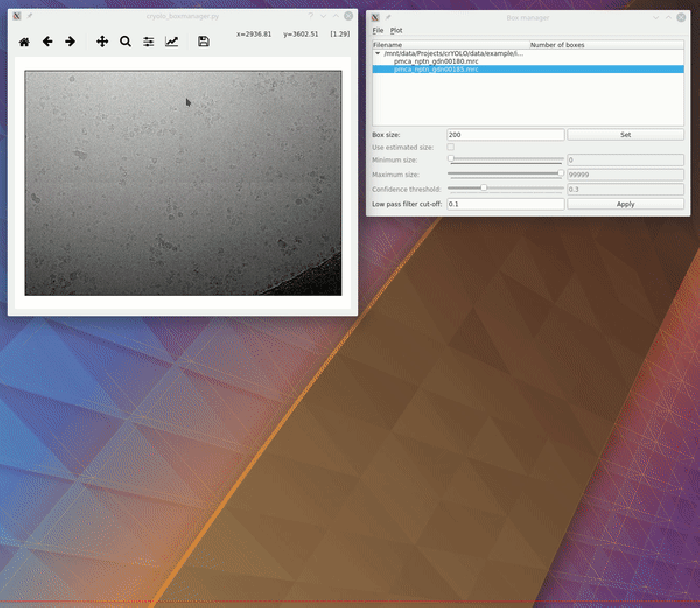
To visualize your results you can use the boxmanager:
As image_dir you select the full_data directory. As box_dir you select the CBOX folder (or EMAN_HELIX_SEGMENTED in case of filaments).
CBOX files contain besides the particle coordinates more information like the confidence and the estimated size of each particle. When importing .cbox files into the box manager, it enables more filtering options in the GUI. You can plot size- and confidence distributions. Moreover, you can change the confidence threshold, minimum and maximum size and see the results in a live preview. If you are done with the filtering, you can then write the new box selection into new box files. The video below shows an example.


