Sidebar
 This version is outdated by a newer approved version.
 This version (2019/09/17 10:23) was approved by twagner.
This is an old revision of the document!
Basic
You now have to create a configuration file your picking project. It contains all important constants and paths and helps you to reproduce your results later on.
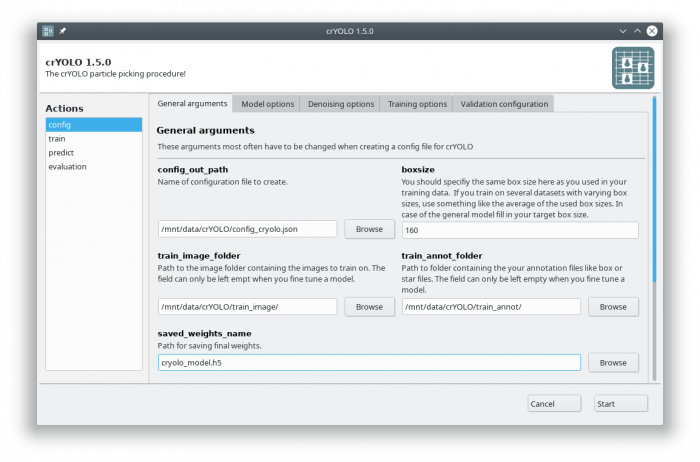
You can either use the command line to create the configuration file or the GUI. For most users, the GUI should be easier. Select the config action and fill in the general fields:
- During training, crYOLO also needs validation data. Typically, 20% of the training data are randomly chosen as validation data. If you want to use specific images as validation data, you can move the images and the corresponding box files to separate folders. Make sure that they are removed from the original training folder! You can then specify the new validation folders in “Validation configuration” tab.
- By default, your images are low pass filtered to absolute frequency of 0.1 and saved to disk. You can change the cutoff threshold and the directory for filtered images in the “Model/Denoising options” tab.
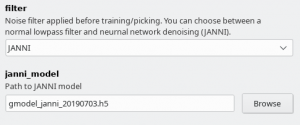
Since crYOLO 1.4 you can also use neural network denoising with JANNI. The easiest way is to use the JANNI's general model (Download here) but you can also train JANNI for your data. crYOLO directly uses an interface to JANNI to filter your data, you just have to change the filter argument in the Model/Denoising tab from LOWPASS to JANNI and specify the path to your JANNI model:
 I recommend to use denoising with JANNI only together with a GPU as it is rather slow (~ 1-2 seconds per micrograph on the GPU and 10 seconds per micrograph on the CPU)
CLnormal
Create the configuration file using the command line:
Create the configuration file using the command line:
To create a basic configuration file that will work for most projects is very simple. I assume your box files for training are in the folder train_annotation and the corresponding images in train_image. I furthermore assume that your box size in your box files is 160. To create the config config_cryolo.json simply run:
cryoloo.py config config_cryolo.json 160 --train_image_folder train_image --train_annot_folder train_annot
To get a full description of all available options type:
cryoloo.py config -h
Click here to get more information about the configuration file
If you want to specify seperate validation folders you can use the --valid_image_folder and --valid_annot_folder options:
cryoloo.py config config_cryolo.json 160 --train_image_folder train_image --train_annot_folder train_annot --valid_image_folder valid_img --valid_annot_folder valid_annot


