SPHIRE Workflow


 This version (2019/12/02 09:42) is a draft.
This is an old revision of the document!
In the following I will assume that your image data is in the folder full_data.
The next step is to create training data. To do so, we have to pick single particles manually in several micrographs. Ideally, the micrographs are picked to completion. However, it is not necessary to pick all particles. crYOLO will still converge if you miss some (or even many).
It depends! Typically 10 micrographs are a good start. However, that number may increase / decrease due to several factors:
We recommend that you start with 10 micrographs, then autopick your data, check the results and finally decide whether to add more micrographs to your training set. If you refine a general model, even 5 micrographs might be enough.
 To create your training data, crYOLO is shipped with a tool called “boxmanager”. However, you can also use tools like e2boxer to create your training data.
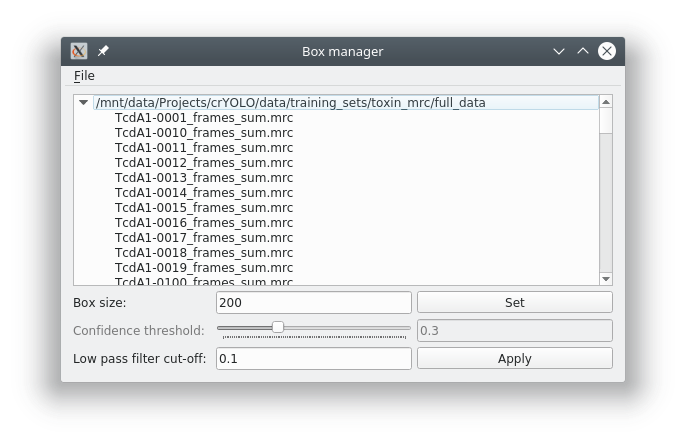
Start the box manager with the following command:
cryolo_boxmanager.py
Now press File → Open image folder and the select the full_data directory. The first image should pop up. You can navigate in the directory tree through the images. Here is how to pick particles:
You might want to run a low pass filter before you start picking the particles. Just press the [Apply] button to get a low pass filtered version of your currently selected micrograph. An absolute frequency cut-off of 0.1. The allowed values are 0 - 0.5. Lower values means stronger filtering.
You can change the box size in the main window, by changing the number in the text field labeled Box size:. Press [Set] to apply it to all picked particles. For picking, you should the use minimum sized square which encloses your particle.
If you finished picking from your micrographs, you can export your box files with Files → Write box files.
Create a new directory called train_annotation and save it there. Close boxmanager.
Now create a third folder with the name train_image. Now for each box file, copy the corresponding image from full_data into train_image1). crYOLO will detect image / box file pairs by taking the box file and searching for an image filename which contains the box filename.