Sidebar
automated_helical_picking
The most recent version of this page is a draft. This version (2018/01/04 15:34) is a draft.
Approvals: 0/1
 This version (2018/01/04 15:34) is a draft.
Approvals: 0/1
This is an old revision of the document!
Table of Contents
Helical Picking Procedure
Overview
Installation
Get your data into ImageJ
Load the raw data
- File → Import → Image Sequence
- Select the folder of your images
- Type the file ending into “File name contains:” (e.g .mrc, .tif)
- Check “Use virtual stack”
- Press OK Now you have read in your data as an image stack.
Reduce the size
For the sake of memory consumption and speed your should reduce the size / image depth of your image data.
- Image → Adjust → Size
- Set the width to 1024. The height is calculated automatically.
- Press OK.
- OPTIONAL - If your images shows very bad contrast (you cant see your particles) do the following:
- Process → Enhance Contrast
- Set “Saturaed pixels” to 0.1%
- Check “Process all X slices”, uncheck everything else
- Press OK
- Image → Type → 8 Bit Wait until the processing is finished.
Save the file for later use
File → Save As → Tiff…
Parameters
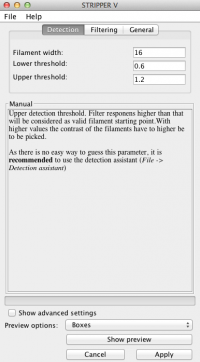
Detection
Filament width
Mask width (Advanced option)
Lower threshold
Upper threshold
Filtering
General
Step-by-Step Tutorial
automated_helical_picking.1515076497.txt.gz · Last modified: 2018/06/20 13:12 (external edit)
Page Tools
Except where otherwise noted, content on this wiki is licensed under the following license: GNU Free Documentation License 1.3


